第5章 Spring Boot整合MyBatis-Plus

分类: springboot 专栏: springboot3.0新教材 标签: mybatis-plus
2024-01-03 09:46:52 2516浏览
前期回顾
- springboot整合mybatis的步骤
- 分页用的是怎么实现的?需要注意什么?(版本)
简介
MyBatis-Plus是国内团队苞米豆在MyBatis基础上开发的增强框架,扩展了一些功能,以提高效率。引入 Mybatis-Plus 不会对现有的 Mybatis 构架产生任何影响,而且 MyBatis-Plus 支持所有 Mybatis 原生的特性。使用Mybtais-Plus可以无须编写SQL语句的就能进行基本的CRUD操作。MyBatis- Plus内置了BaseMapper,提供了大量的CRUD方法,可以满足大部分单表的简单查询。Mybatis-Plus具有无侵入、损耗小等特性,支持强大的 CRUD 操作、支持 Lambda 形式调用、支持主键自动生成、支持 ActiveRecord 模式、支持自定义全局通用操作,具有内置代码生成器、内置分页插件、内置性能分析插件、内置全局拦截插件。
基本CRUD查询
1.加依赖
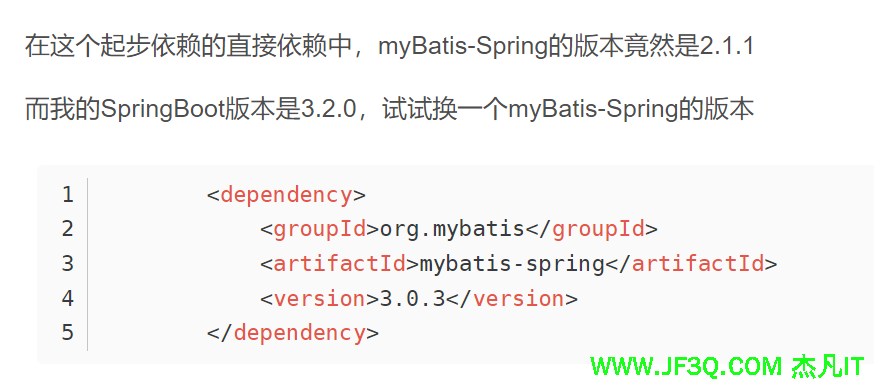
          <dependency>
            <groupId>org.mybatis</groupId>
            <artifactId>mybatis-spring</artifactId>
            <version>3.0.3</version>
        </dependency>
        <dependency>
            <groupId>com.baomidou</groupId>
            <artifactId>mybatis-plus-boot-starter</artifactId>
            <version>3.5.4</version>
        </dependency>
        <dependency>
            <groupId>org.springframework.boot</groupId>
            <artifactId>spring-boot-starter-web</artifactId>
        </dependency>
        <dependency>
            <groupId>org.springframework.boot</groupId>
            <artifactId>spring-boot-starter-thymeleaf</artifactId>
        </dependency>

        <dependency>
            <groupId>org.springframework.boot</groupId>
            <artifactId>spring-boot-devtools</artifactId>
            <scope>runtime</scope>
            <optional>true</optional>
        </dependency>
        <dependency>
            <groupId>mysql</groupId>
            <artifactId>mysql-connector-java</artifactId>
            <version>8.0.22</version>
        </dependency>

        <dependency>
            <groupId>org.projectlombok</groupId>
            <artifactId>lombok</artifactId>
            <optional>true</optional>
        </dependency>
2.实体类
@Data
@AllArgsConstructor
@NoArgsConstructor
@TableName("book")
public class Book {
	@TableId(value="id",type= IdType.AUTO)
	private Integer id;

	@TableField("name")
	private String name;
	private double price;
	private String category;
	private int pnum;
	private String imgurl;
	private String description;
	private String author;
	private int sales;
其中注解@TableName表示该实体类对应的数据库表名,如果实体类与表名不一致,则这一步是必要的,否则可以不添加该注解,默认表名与实体类名称相同。注解@TableId表示实体类中对应数据库表的主键的属性,其中type= IdType.AUTO表示主键由数据库自增长。
3.配置文件
配置数据库的连接信息跟上次课的一样,
此外也可全局设置表名的前缀,比如数据库中的表名有可能是带t_开头的,但实体类一般不这样开头,所以会导致表名与实体类名称不一致,主要差别可能就是这个t_,这时就可以在这里配置一下条件查询
还可在这里全局设置主键的增长方式
说明:上述配置非必要,如果实体类已经对表名进行了映射,并且主键也指定了增长策略,则无须上述两个配置。
其他常用配置

4.编写mapper接口
@Mapper
public interface BookMapper extends BaseMapper<Book> {

}
这里面可以不定义任何方法,因为父接口BaseMapper已经包含了基本的增删改查方法,在业务层中调用即可。同样可以选择在这个接口上面添加@Mapper注解或者在启动类上添加MapperScan(“接口所在包名”)注解,这里选择后者。
5.编写service
public interface IBookService extends IService<Book> {

}
@Service
public class BookServiceImpl extends ServiceImpl<BookMapper, Book> implements IBookService{
}
6.效果

条件查询
BaseMapper接口提供的CRUD方法中,有些方法提供了Wrapper类型的参数,用于设置查询条件,Wrapper类型的参数既可以使用子类QueryWrapper对象,也可以使用子类LambdaQueryWrapper对象。
 @Override
public List<Book> searchBooks(Book book) {
    QueryWrapper queryWrapper=new QueryWrapper();
    if (book.getName() != null && book.getName() != "") {
        queryWrapper.like("name",book.getName());
    }
    if (book.getCategory() != null && book.getCategory() != "") {
        queryWrapper.eq("category",book.getCategory());
    }
    if (book.getAuthor() != null && book.getAuthor() != "") {
        queryWrapper.eq("author",book.getAuthor());
    }
    return bookMapper.selectList(queryWrapper);
}
上面使用QueryWrapper封装查询条件时各个属性是手打的字符串,容易出错,而使用LambdaQueryWrapper封装查询条件时可以使用Lambda表达式,可以调用各个属性,从而避免这个错误。
 LambdaQueryWrapper<Book> queryWrapper = new LambdaQueryWrapper();
    if (book.getName() != null && book.getName() != "") {
        queryWrapper.like(Book::getName,book.getName());
    }
    if (book.getCategory() != null && book.getCategory() != "") {
        queryWrapper.eq(Book::getCategory,book.getCategory());
    }
    if (book.getAuthor() != null && book.getAuthor() != "") {
        queryWrapper.eq(Book::getAuthor,book.getAuthor());
    }
    return bookMapper.selectList(queryWrapper);
分页查询
@Configuration
public class MybatisPlusConfig {
    @Bean
    public MybatisPlusInterceptor paginationInterceptor() {
        MybatisPlusInterceptor mybatisPlusInterceptor=new MybatisPlusInterceptor();
        mybatisPlusInterceptor.addInnerInterceptor(new PaginationInnerInterceptor());
        return mybatisPlusInterceptor;

    }
}
@Override
public IPage<Book> getPage(int pageNum, int size) {
IPage<Book> bookPage = new Page<>(pageNum, size);//参数一是当前页,参数二是每页个数
bookPage = bookMapper.selectPage(bookPage, null);
return bookPage;
}- 那带上排序怎么操作?

注:Page类是IPage接口的实现类。

<table border="1" align="center">
<tr>
<td>编号</td>
<td>书名</td>
<td>库存</td>
<td>价格</td>
<td>类目</td>
<td>说明</td>
<td>图片</td>
<td>作者</td>
<td>已售</td>
</tr>
<tr th:each="book:${page.records}">
<td th:text="${book.id}"></td>
<td th:text="${book.name}"></td>
<td th:text="${book.pnum}"></td>
<td th:text="${book.price}"></td>
<td th:text="${book.category}"></td>
<td th:text="${book.description}"></td>
<td th:text="${book.imgurl}"></td>
<td th:text="${book.author}"></td>
<td th:text="${book.sales}"></td>
</tr>
</table>
<br/>
<div>
<a th:if="${page.current>1}" th:href="@{/booksPage(start=${page.current-1})}">上一页</a>
总页数:<span th:text="${page.getPages()}"></span>
当前页:<span th:text="${page.current}"></span>
总记录数:<span th:text="${page.total}"></span>
<a th:if="${page.current<page.getPages()}" th:href="@{/booksPage(start=${page.current+1})}">下一页</a>
</div>补充多表联查的分页查询并带条件并排序
  //查所有的学生并且分页 并且把班级信息也带出来
    Page<Student> getAllWithClass(Page<Student> page,@Param("stu") Student student);
   <select id="getAllWithClass" resultMap="studentWithClass">
        select s.* ,c.* from student s
         left join classinfo c on c.classno= s.classno

        <where>
            <if test="stu.classno != null">
                s.classno= #{stu.classno}
            </if>
        </where>
        order by s.id desc


    </select>


    <resultMap id="studentWithClass" type="student">

        <id property="id" column="id"></id>
        <result property="classno" column="classno"/>
        <result property="studentname" column="studentname"/>
        <result property="age" column="age"/>
        <result property="gender" column="gender"/>
        <association property="classInfo" javaType="classInfo">
            <id column="classno" property="classno"></id>
            <result property="classname" column="classname"/>
        </association>

    </resultMap>
测试
 @Test
    void testPage2(){

        Page<Student> page= new Page<>(1,2);

        Page<Student>  pageInfo= studentMapper.getAllWithClass(page);

        System.out.println(pageInfo);
    }
作业
课堂上的book分页列表展示条件查询 +增删改查都实现
好博客就要一起分享哦!分享海报
此处可发布评论
评论(0)展开评论
展开评论
您可能感兴趣的博客
 新业务
新业务  springboot学习
  ssm框架课
  vue学习
vue学习  【带小白】java基础速成