第五章-初识spring框架

分类: ssm 专栏: ssm框架课 标签: spring框架入门
2022-12-06 10:16:37 1733浏览
1.简单介绍
是一个轻量级的企业级应用框架,企业应用开发的"一站式"选择,贯穿于表现层、业务层、持久层
优点:
- 低侵入式设计
- 独立于各种应用服务器
- 依赖注入特性将组件关系透明化,降低耦合度
- 面向切面编程特性允许将通用任务进行集中式处理
- 与第三方框架的良好整合
核心主要是ioc和aop,如何理解参考:
https://blog.csdn.net/javaxuanshou/article/details/109248124
2.spring ioc
将组件对象的控制权从代码本身转移到外部容器。
形象举例子:比如你现在想买瓶水,又想买桶泡面,还要加跟火腿肠,传统的做法就是你现在去家附近的超市去买这几样东西,而采用ioc控制反转的方式就是你在美团平台上找到了附近的小卖部(万一小卖部很远),直接手机上选择你要买的东西下单后对方给送货上门。你在家等着就行。
也就是说传统方式的话是你a对象需要new b对象(水) new c对象(泡面) new d对象(火腿肠),然后才能调用方法
而采用ioc的话就只需要两步1.注册美团会员并登录2.找到想要的东西下单。
类比spring就是美团app
1.在spring的ioc容器中把a,b,c,d先放进去
2.告诉spring,a需要b,c ,d(依赖注入)
2.1第一个spring程序
1.下载jar包
参考文章:https://blog.csdn.net/weixin_45863084/article/details/114660396
这边下载spring5.2.2版本的jar地址:https://repo.spring.io/ui/native/libs-release-local/org/springframework/spring/5.2.2.RELEASE/
使用ioc模块需要的jar:
1.四个spring的核心包
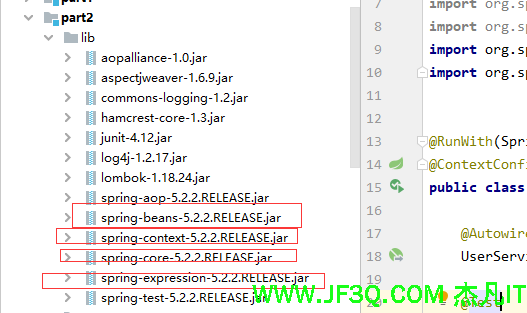
2.为了方便打印日志这里加了log4j和commons-logging包
3.为了方便写测试类这里加了junit4和他的依赖包hamcrest-core包
2.配置applicationContext
 <bean id="helloSpring" class="com.jf3q.controller.HelloSpring">
        <property name="hello" value="反转的人生,如此惊艳!"/>
    </bean>

    <bean id="userDao" class="com.jf3q.dao.impl.UserDaoImpl"></bean>

    <bean id="userService" class="com.jf3q.service.impl.UserServiceImpl">
        <property name="userDao" ref="userDao"/>
    </bean>
3.编写bean实体类
    //定义hello属性,该属性的值将通过spring框架进行设置
    private  String hello = null;


    public void print(){
        log.info("spring say :"+ this.getHello()+"!");
    }

    public String getHello() {
        return hello;
    }

    public void setHello(String hello) {
        this.hello = hello;
    }
public UserDao userDao ;
@Override
public void addUser(UserInfo userInfo) {
userDao.addUser(userInfo);
}
public void setUserDao(UserDao userDao) {
this.userDao = userDao;
}4.编写测试类
 @Test
   public void testSpringAddUser(){
        ApplicationContext context = new ClassPathXmlApplicationContext("applicationContext.xml");
        UserService userService = context.getBean(UserService.class);
        userService.addUser(new UserInfo().setId(1).setPassword("123456").setUsername("xiaojie"));
    }

    @Test
    public  void testHelloSpring(){
        ApplicationContext context = new ClassPathXmlApplicationContext("applicationContext.xml");
        HelloSpring helloSpring = context.getBean(HelloSpring.class);
        helloSpring.print();
    }
2.2使用springIOC实现Javabean注入
编写一个打印机程序:
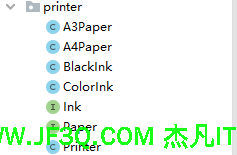
<bean id="a3Paper" class="com.jf3q.printer.A3Paper"></bean>
<bean id="a4Paper" class="com.jf3q.printer.A4Paper"></bean>

<bean id="blackInk" class="com.jf3q.printer.BlackInk"></bean>
<bean id="colorInk" class="com.jf3q.printer.ColorInk"></bean>

<bean id="printer" class="com.jf3q.printer.Printer">
  <property name="ink" ref="blackInk"></property>
  <property name="paper" ref="a4Paper"></property>
</bean>
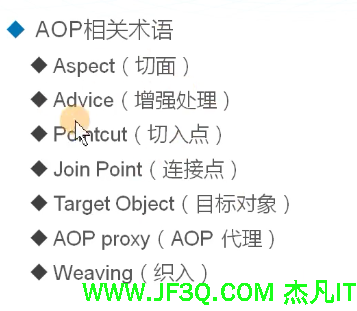
3.spring aop
切面:与业务逻辑代码不怎么相关,但我们又不得不处理的代码块(随处散落渗透在系统各处,与业务逻辑不相关,但是我们又不得不处理的这些方面)
aop底层是用的动态代理的模式
在不修改源程序的基础上,对代码段增加新的功能,实现代码增强。
形象举例子:你是个富二代,每天最重要的事就是出去玩(这是正事),但那些叠被子,做饭,洗衣服之类的都不是你关注的点,可这些也都非常重要,怎么办直接花钱请人做,等办完正事的时候要回家,直接安排司机过去接。
AOP的好处就是你只需要干你的正事,其它事情别人帮你干。
从Spring的角度看,AOP最大的用途就在于提供了事务管理的能力。事务管理就是一个关注点,你的正事就是去访问数据库,而你不想管事务(太烦),所以,Spring在你访问数据库之前,自动帮你开启事务,当你访问数据库结束之后,自动帮你提交/回滚事务!
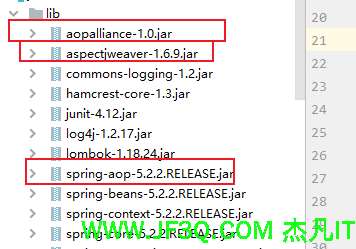
案例:编写保存用户的日志增强代码
- 添加aop的三个相关jar包
- 编写日志增强类
@Log4j
public class UserServiceLog {

    public void before(JoinPoint jp){

        log.info("调用对象:" + jp.getTarget()
                + "\n 方法" + jp.getSignature().getName() + "\n 入参:" + Arrays.toString(jp.getArgs()));
    }


    public void afterReturn(JoinPoint jp,Object result){

        log.info("调用对象:" + jp.getTarget()
                + "\n 方法" + jp.getSignature().getName() + "\n 返回值:" +result);
    }
}- 配置applicationContext.xml文件
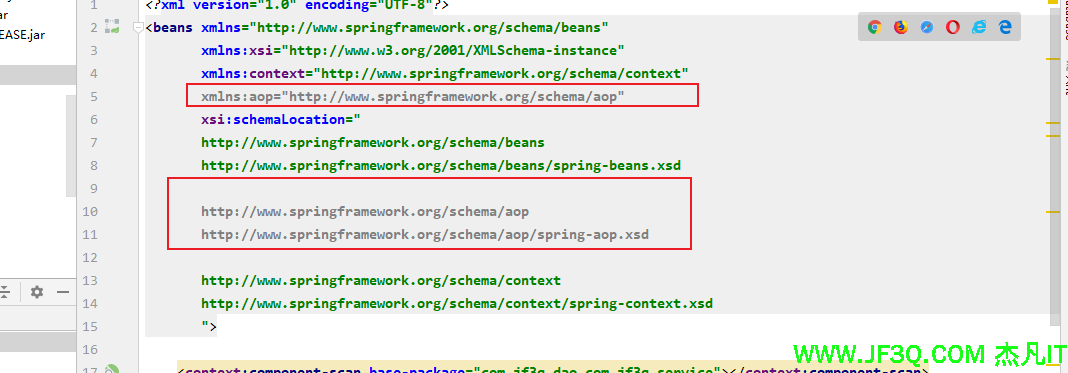
    <!--配置切面-->
    <aop:config>
        <!--定义切入点-->
        <aop:pointcut id="pc" expression="execution( public void addUser(com.jf3q.pojo.UserInfo))"/>

        <!--引用包含增强方法的bean-->
        <aop:aspect ref="userServiceLog">
            <!--配置前置增强引入切入点-->
            <aop:before method="before" pointcut-ref="pc"/>
            <!--配置后置增强引入切入点-->
            <!--通过returning属性指定名为result的参数注入返回值-->
            <aop:after-returning method="afterReturn" returning="result" pointcut-ref="pc"/>
        </aop:aspect>
    </aop:config>
补充说明:

<aop:pointcut id="pc" expression="execution( * com.jf3q.service..*.*(..))"/>
匹配com.jf3q.service包下及其子包的所有类的所有方法
- 编写测试类
@Test
    public  void userServiceLogTest(){
        ApplicationContext context = new ClassPathXmlApplicationContext("applicationContext.xml");
        UserService userService = context.getBean(UserService.class);
        userService.addUser(new UserInfo().setUsername("张三").setPassword("123456"));

    }
spring自带的测试类方式简化代码,前提是必须引入aop
@RunWith(SpringJUnit4ClassRunner.class)
@ContextConfiguration("classpath:applicationContext.xml")
public class SysUserMapperTest {
    @Autowired
    SysUserService sysUserService;
好博客就要一起分享哦!分享海报
此处可发布评论
评论(0)展开评论
展开评论
您可能感兴趣的博客
 新业务
新业务  springboot学习
  ssm框架课
  vue学习
vue学习  【带小白】java基础速成